 Stayntouch PMS
 How to Manage Allotments
Refer to this guide to learn how to set up allotments in Stayntouch PMS.
Note:
- Regarding rate setup with allotments, you have the option to choose a preconfigured rate or a custom rate. Preconfigured rates (Settings > Rates > Rates) have set prices and rate types, while custom rates can be setup during the allotment creation process to include/exclude as many rates as you would like. You can also configure the price of the custom rate during setup. Preconfigured rate prices have to be managed from the Rate Manager.
- Reinstating: You can reinstate no show or canceled group/allotment reservations. If group or allotment no show reservation is reinstated; be sure to update group/allotment blocked/picked-up count accordingly. No show reservations will return to the current business date.
- Borrowing: You can borrow inventory in the allotments module. When trying to assign a room to an allotment reservation, and no room type availability exists, the user will be offered alternative/upgrade room types as per current functionality. If the selected room type is not part of the allotment blocked rooms, the message, “Selected Room Type is not part of the Group Room Block” will display.
- Options “Borrow from Room type (x) <newly selected room type>” or “Cancel”
- When the user selects cancel, he will be returned to the previous screen with no action taken.
- When the user selects "Borrow," the newly selected room type will be assigned to the reservation, and it will be taken out of the hotel's availability count; however, the rate will not be updated.
- Once a rate is configured for the room type, either in the actual rate or custom rate, the grid for this room type should be editable. The user will then be allowed to add additional rooms to this room type.
- Reservations that have been moved to this room type will keep the rate that they had from the initial room type.
- Newly added reservations will have the rate that is configured for this room type.
- Options “Borrow from Room type (x) <newly selected room type>” or “Cancel”
- Credit Limit: It is possible to specify a credit limit with the allotment (when configured Direct Billing instructions). Specify the credit limit in the box below:

HOW TO CONFIGURE AN ALLOTMENT
Step 1.
From the Sidebar Menu, choose Groups > New Allotment.

Step 2.
Complete the following fields:
Allotment Name (mandatory)
First Name (mandatory)
Last Name (mandatory)
Hold Status (mandatory)
From Date / To Date (mandatory)
Do NOT set the Allotment Release Date (we will explain this later in the guide).
Rate: Select your rate from the dropdown menu.
Choose the Save Allotment button in the upper right hand corner when you’re done.

Step 3.
Proceed to the Allotment Details tab.
Select the Add Rooms & Rates button.

Step 4.
A pop-up “ROOM TYPES AND RATES” message will appear listing all the rooms associated with this rate.
You have the option to remove room types (with the red “x” button).
Select Update.
Rate prices cannot be changed.

Note: If you chose to use a ‘Custom Rate’, then you will be able to add additional room types (with the green “plus” button)—and assign a different price to each room type.
When you’re done, click ‘Update’ to save.
A custom rate allows users to add different room types (with the green “+” icon):

A custom rate allows users to assign different prices to room types:

Step 5.
Stayntouch PMS will return to the Allotment Details view.
Now, you can begin assigning the number of rooms per room type. This will indicate to Stayntouch PMS how many rooms you are “setting aside” for the allotment.
For example, in the screenshot below, we are making 3 loft rooms available to be blocked for the allotment.
Scroll vertically to see more rooms or horizontally to see additional dates
In the example screenshot below, the allotment has been set to 1 night. If we had set up the allotment for additional days, then there would be more dates.

Step 6.
Once you’re done allocating the number of rooms per room type, you can choose any of the following buttons:
Discard Changes: This will reset all the numbers on the page to zero.
Update Contract: This assigns the number of rooms to the allotment; this does not impact house availability.
Apply to Held Room Counts: This is the same as committing the rooms to the allotment; this will impact house availability.

Note: If you choose to copy the number of rooms across the allotment, it automatically updates the contract (which does not affect availability).
Only the “Apply to Held Room Counts” will show thereafter.


Step 7.
Once you select the Apply to Held Room Counts button, click the Summary tab, and then return to the Allotment Details tab. You will notice that the Grid View will have auto-updated to CURRENT STATUS.
Make sure you continue to manage the room counts from the CURRENT STATUS view.

Step 8.
Now we need to specify a “release” schedule for the allotment.
You may do this either:
1. From the Summary tab, OR
2. From the Allotment Details > Grid View > RELEASE DATE option.
However you decide to manage the release date, make sure you ONLY choose one of the options above. (Attempting to configure the release date from both pages may result in errors.)
Summary Tab:
Locate the Allotment Release Date.
Choose a date from the calendar icon that appears.

In addition, we have the Release Now button (which immediately releases all held inventory).

Grid View:
Your other option is to set the Release Date from the Grid View drop down menu.
When releasing an allotment, rooms are released based on the number of days prior to the date (indicated below).
For example, by entering “4” below, the user is indicating that they would like the rooms to be released 4 days before January 20 (which would be January 16).
Rooms are releases as End of Day completes. As we mentioned, this process is based on the “days prior to”, so the release date cannot be the current business date (as EOD will already have completed).

You can apply a single “day prior to” value for the entire allotment (make sure to use the Apply button):

Or you can specify a different “day prior to” value (make sure to use the Apply button):

Step 9.
Success! You’re all done!
[TIP] A helpful note reading the Availability page for allotments:
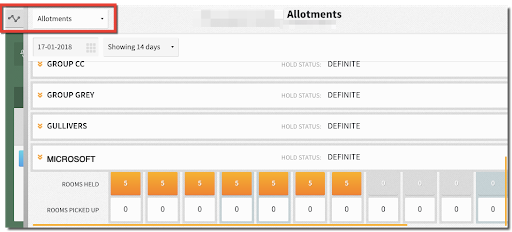
Click the gear icon to reveal the Availability page.

- Rooms will only be included when viewing the availability page if the option Apply to Held Room Counts has been selected from the Allotment Details tab (notice the room counts in orange).
- Rooms will not be counted if you choose the Discard Changes or the Update Contract button (notice the numbers below are zeros).
